When it’s time for a roof replacement, knowing how the process works helps you feel confident in the quality and longevity of your new roof. At Weather Stop Roofing, we believe in doing the job right, from the very first nail to the final shingle.
Here’s a breakdown of the step-by-step roof installation process, starting from the bottom and working up to the final ridge vent.
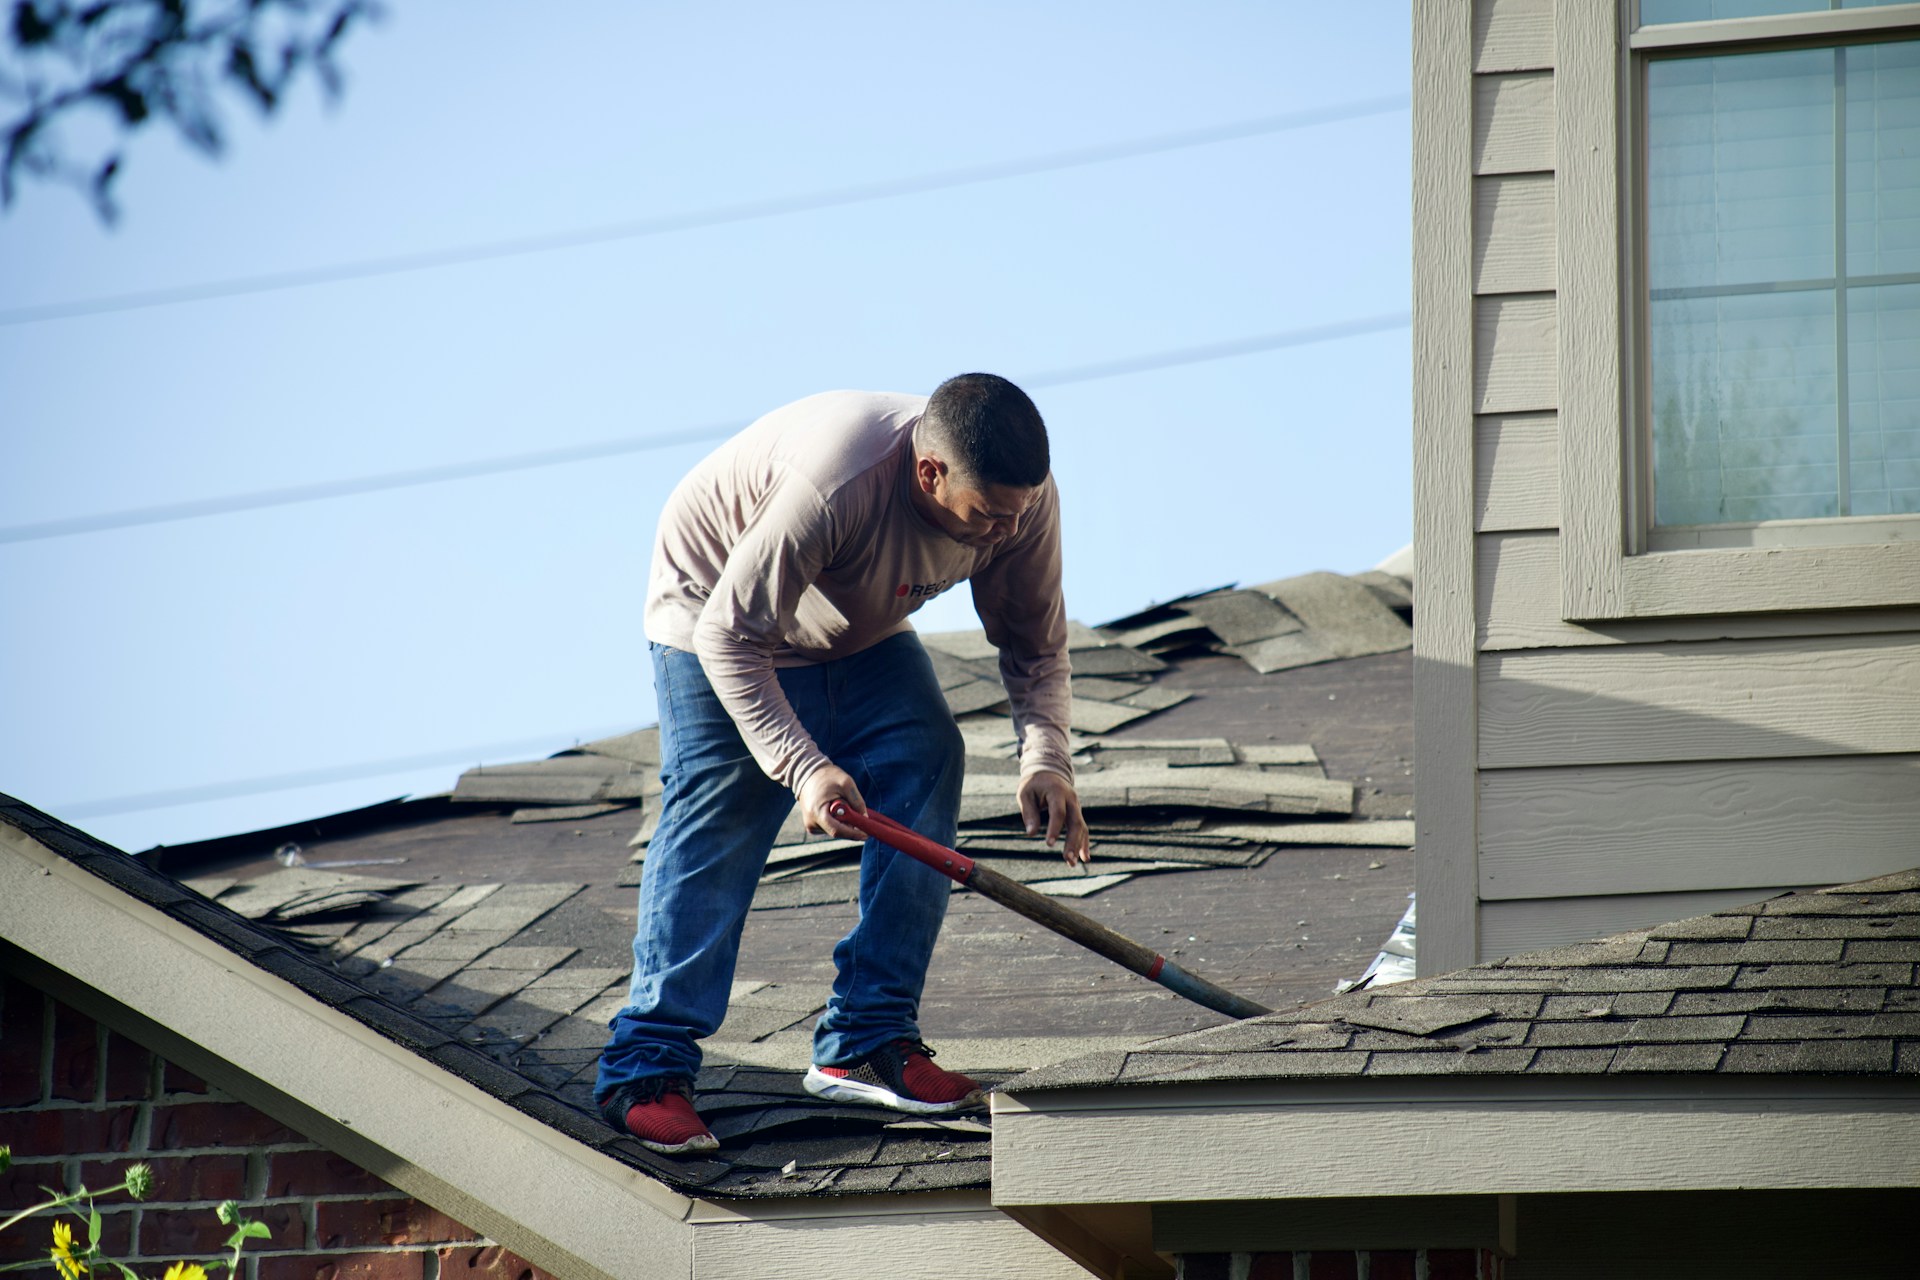
1. Removing the Existing Roof
The very first thing we do when we arrive at your home the day of replacement is remove the existing shingles and other roofing materials. All old materials go into a trailer to be disposed of properly, ensuring there are no old materials leftover on your roof or in your yard.
2. Cleaning the Roof Substrate
Every great roof starts with a clean, solid foundation. Once the old roofing materials are removed, our team thoroughly cleans the roof deck (also called the substrate).
A clean surface ensures:
- Proper adhesion of underlayment
- Accurate inspection of decking condition
- A smooth, even surface for long-term durability
Skipping this step could lead to uneven installation or moisture trapped beneath new materials—issues that shorten the lifespan of your roof.
3. Inspecting the Roof Substrate
Before any materials go down, a professional roofer must inspect the decking for signs of wood rot, warping, or structural weakness.
At Weather Stop Roofing, our crews carefully check every sheet of decking to confirm it’s strong and stable. Any compromised wood is cut out and replaced with new panels.
This ensures your new roof has a solid foundation that can handle Cincinnati’s heavy rain, snow, and wind. It also ensures compliance with codes and manufacturer specifications – installing new materials over compromised decking risks nullifying most manufacturer warranties.
4. Ice and Water Shield
Next comes one of the most critical layers for roof protection: the ice and water shield.
Installed according to local building code, this self-sealing membrane goes in vulnerable areas such as:
- Roof eaves
- Valleys
- Low-slope sections
- Transitions between roof planes
This shield helps prevent water infiltration from ice dams and wind-driven rain—common issues during Cincinnati’s wet and icy months.
5. Roofing Felt (Underlayment)
Wherever ice and water shield is not applied, we install roofing felt (also called underlayment).
This secondary moisture barrier provides an added layer of protection between the decking and shingles. It helps:
- Prevent leaks during heavy rain
- Improve shingle adhesion
- Extend the life of the roof system
Modern synthetic felts also resist tearing and provide better protection than traditional paper-based underlayment.
6. Flashings and Drip Edge
Flashings and drip edge are essential for channeling water away from critical areas of your roof.
Flashings are installed around:
- Chimneys
- Skylights
- Vents and pipes
- Wall transitions
Meanwhile, drip edge is added along the roof’s edges to guide water into the gutters—preventing damage to fascia boards and reducing rot risk.
Proper flashing and drip edge installation are key to a watertight system. Even a small oversight here can lead to leaks down the road.
7. Valleys
Roof valleys—where two roof planes meet at an inward angle—are especially prone to water flow and debris buildup.
If your new roof uses an open valley system, metal flashing is installed first, before any shingles. This metal layer adds durability and directs water efficiently off your roof.
At Weather Stop Roofing, we use high-quality metal valley liners that hold up against Cincinnati’s seasonal rains and snowmelt.
8. Shingle Installation
With the underlayment and flashing complete, it’s time for shingles, the most visible and protective part of your roof.
Each shingle is installed according to manufacturer specifications, which include:
- Correct nailing patterns and placement zones
- Specific numbers of fasteners
- Overlap dimensions for durability and waterproofing
- Hip & Ridge shingles for the outward angles of your roof (hips) and the peak of your roof (ridge)
Following manufacturer guidelines not only ensures proper performance but also preserves your roofing material warranty.
Popular shingle options, like Owens Corning Duration Series or CertainTeed Landmark shingles, combine aesthetic appeal with strength—ideal for Cincinnati homes.
9. Shingle-Over Ridge Vents
The final step in your roof installation is installing ridge vents along the roof’s peak.
These vents allow hot, humid air to escape from your attic while drawing in cooler air through the soffits. This circulation helps:
- Prevent moisture buildup and mold
- Regulate indoor temperatures
- Extend shingle lifespan
The ridge vent is then covered with matching shingles for a seamless, finished look.
Note: If your new roof uses another ventilation system (such as box or gable vents), we will install those according to local building codes as well.
Why This Process Matters
Each step—from cleaning the deck to installing ridge vents—plays a vital role in the performance and longevity of your roof. Skipping or rushing even one stage can lead to:
- Leaks and water damage
- Poor ventilation and mold growth
- Shortened roof lifespan
Understand, not all roof replacements are the same – this list includes the most prominent steps across most roof replacements we do, but is not exhaustive of all components we may address during your unique roof replacement.
At Weather Stop Roofing, we follow a meticulous, code-compliant process for every roof installation, ensuring long-lasting results and complete homeowner confidence.
Protect Your Home with a Roof Built to Last
Whether you need a full roof replacement or want to learn more about our roof inspections, our team is here to help.
Every Weather Stop roof is installed from the bottom to the top with precision, integrity, and top-quality materials built for Cincinnati weather.
👉 Schedule your free roof inspection today: https://weatherstoproofing.com/contact/
Bottom to Top Roof Installation Explained
Check out our Reviews on Google!